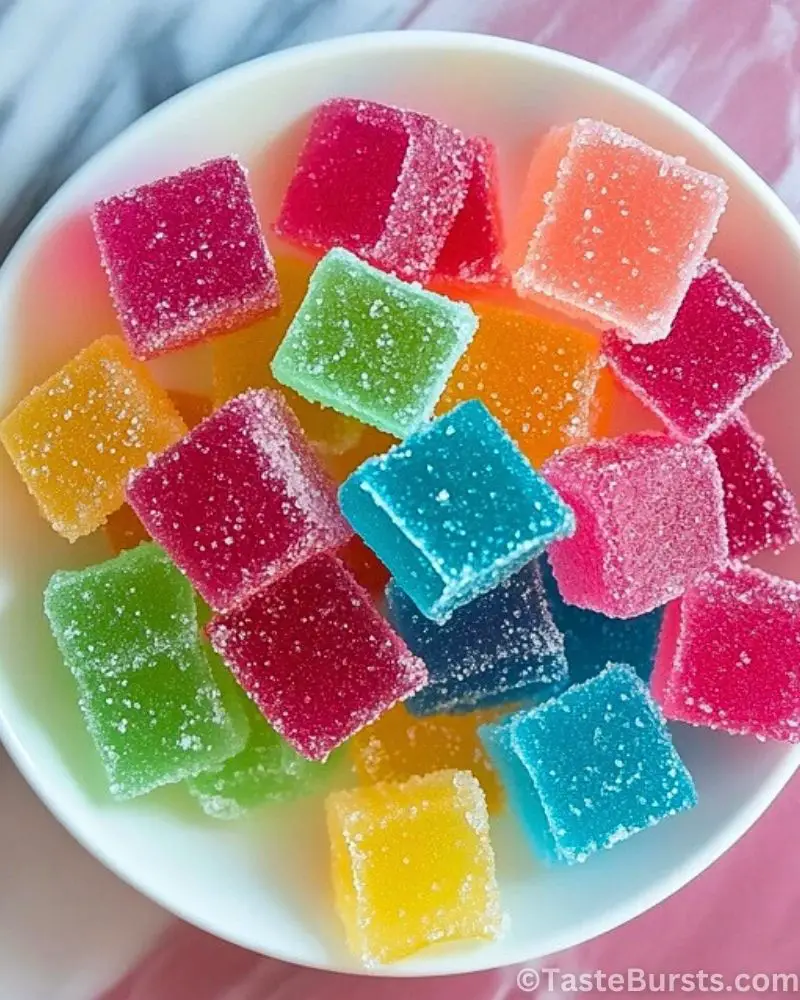
Colorful, chewy, and bursting with fruity flavor — Kool-Aid Gummy Treats are the ultimate DIY candy you didn’t know you needed in your life. These vibrant little cubes are a joyful explosion of sweet and tangy goodness, perfect for kids’ parties, nostalgic snacking, or gifting in cute jars. Each bite delivers a satisfying chew with a crystal sugar crunch on the outside and a soft, juicy gummy texture inside. And the best part? You can customize them with any flavor of Kool-Aid you love — cherry, blue raspberry, lemon-lime, or even a wild tropical punch.

Making these gummies at home is surprisingly simple and incredibly fun. No fancy equipment needed — just a few pantry staples and your favorite Kool-Aid packets. It’s a great recipe to make with kids, especially when you want something colorful and creative to fill an afternoon. Whether you’re making them for a school event, birthday party, or just to satisfy your sweet tooth, these homemade treats are way more fun (and tasty) than store-bought candy.
Ingredients for Kool-Aid Gummy Treats
- 1 cup cold water
- 3 tablespoons unflavored gelatin (about 4 packets)
- 1 ½ cups granulated sugar (plus extra for coating)
- 1 packet Kool-Aid (any flavor of your choice)
- Optional: 1-2 drops food coloring (for extra brightness)
- Nonstick spray or a little oil (for greasing the mold/pan)
Step 1: Bloom the Gelatin
Start by pouring the cold water into a medium-sized saucepan. Sprinkle the unflavored gelatin evenly over the water’s surface and let it sit undisturbed for about 5 minutes. This process is called “blooming” and is essential for activating the gelatin properly so your gummies set with the perfect chewy texture.
Step 2: Add Sugar and Kool-Aid
Once the gelatin has bloomed, turn the heat to medium-low. Add the granulated sugar and the packet of Kool-Aid. Stir constantly until the sugar and gelatin are completely dissolved. Be careful not to let the mixture boil — it just needs to heat through until smooth and fully combined. If you’re going for bold colors, now is the time to add a drop or two of food coloring.
Step 3: Pour into Molds
Lightly grease your silicone candy molds or a shallow pan with nonstick spray or a tiny bit of oil. Carefully pour the warm mixture into the molds. If using a pan, aim for about ½-inch thickness so they’re easy to cut later. Let it cool at room temperature for 10–15 minutes, then transfer to the fridge and chill for at least 2 hours or until fully set.
Step 4: Cut and Coat
Once the gummies are firm, gently remove them from the molds. If you used a pan, cut them into cubes using a greased knife or pizza cutter. Toss the gummies in a small bowl of granulated sugar to give them that classic candy sparkle and keep them from sticking to each other.
Step 5: Serve and Enjoy!
Your Kool-Aid Gummy Treats are now ready to enjoy! Serve them as-is, package them in small jars for gifting, or pop a few into lunchboxes for a sweet surprise. They’re deliciously fruity, fun, and super satisfying to snack on.
Storage Instructions
To keep your Kool-Aid Gummy Treats fresh and chewy, store them in an airtight container. You can leave them at room temperature for up to 3 days, but for best texture and longer shelf life, refrigerate them — they’ll stay fresh for up to 2 weeks. Make sure the container is dry and clean, as moisture can cause the sugar coating to dissolve and the gummies to become sticky.
Avoid storing them in warm or humid areas, as the gelatin can start to soften. If they start sticking together, a quick roll in fresh sugar can help restore their sparkle and prevent clumping.
Estimated Nutrition
Serving Size: 4–5 small cubes (approx. 40g)
Calories: ~130
Total Fat: 0g
Sodium: 5mg
Total Carbohydrates: 33g
Sugars: 32g
Protein: 2g (from gelatin)
Note: Nutrition may vary depending on Kool-Aid flavor, amount of sugar coating, and portion size.
Frequently Asked Questions
What kind of gelatin should I use?
Use unflavored gelatin, like Knox or any store-brand version. Avoid flavored gelatin mixes like Jell-O — they already contain sweeteners and colorants that will affect the recipe.
Can I use sugar substitutes?
Yes, you can substitute granulated sugar with alternatives like erythritol or monk fruit sweetener, but the texture may change slightly. Avoid liquid sweeteners as they can make the gummies too soft.
Do I need to refrigerate the gummies?
Refrigeration is not required, but it helps the gummies last longer and keeps them firmer. If your home is warm or humid, it’s highly recommended.
Can I make them vegan?
Traditional gelatin is animal-based, but you can try using agar-agar as a vegan substitute. Note that it sets differently and may result in a slightly firmer, jelly-like texture.
How long do Kool-Aid Gummy Treats last?
At room temperature: 2–3 days.
In the fridge: up to 2 weeks.
For long-term storage, freeze them — just coat with sugar after thawing.
Can I double or triple the recipe?
Absolutely! Just maintain the same ratios of gelatin, water, sugar, and Kool-Aid. Use multiple molds or larger pans as needed.
Why are my gummies sticky?
Too much moisture or not enough sugar coating can cause stickiness. Let them air dry a bit and roll again in sugar before storing.
What flavors work best?
Bold and tangy flavors like cherry, grape, tropical punch, and blue raspberry stand out the most. But feel free to get creative — even mixing flavors can be fun!